By Lauren Eggleston
Save the River first published a booklet on Alternative On-Site Systems in 1984 and has since published updates to the Sewage Handbook in 1989, 1995, and 2004. This year we’ve been diligently working to update the Guide for a web publication; a project made possible by a donation from long-time member Judy Sweet of Indian Point. In our updates, we encourage shoreline residents to make decisions informed by science. Together, we can stay up-to-date about wastewater technology, regulations, and best management practices. It’s important to check with state and local regulatory agencies before undertaking sewage management projects. These agencies provide current information on permitting and regulations, new technology, best management practices, and reimbursement or funding opportunities.
In this update to the Sewage Handbook, we are fortunate to be working with Eric Murdock, P.E. of Onsite Engineering, PLLC. Eric specializes in innovative design techniques for installing septic systems at challenging sites that do not have the space, soil type or soil depth traditionally needed to install a more traditional septic system. Onsite systems use in-tank treatment methodologies to bioremediate and disinfect wastewater. The result is clean water.
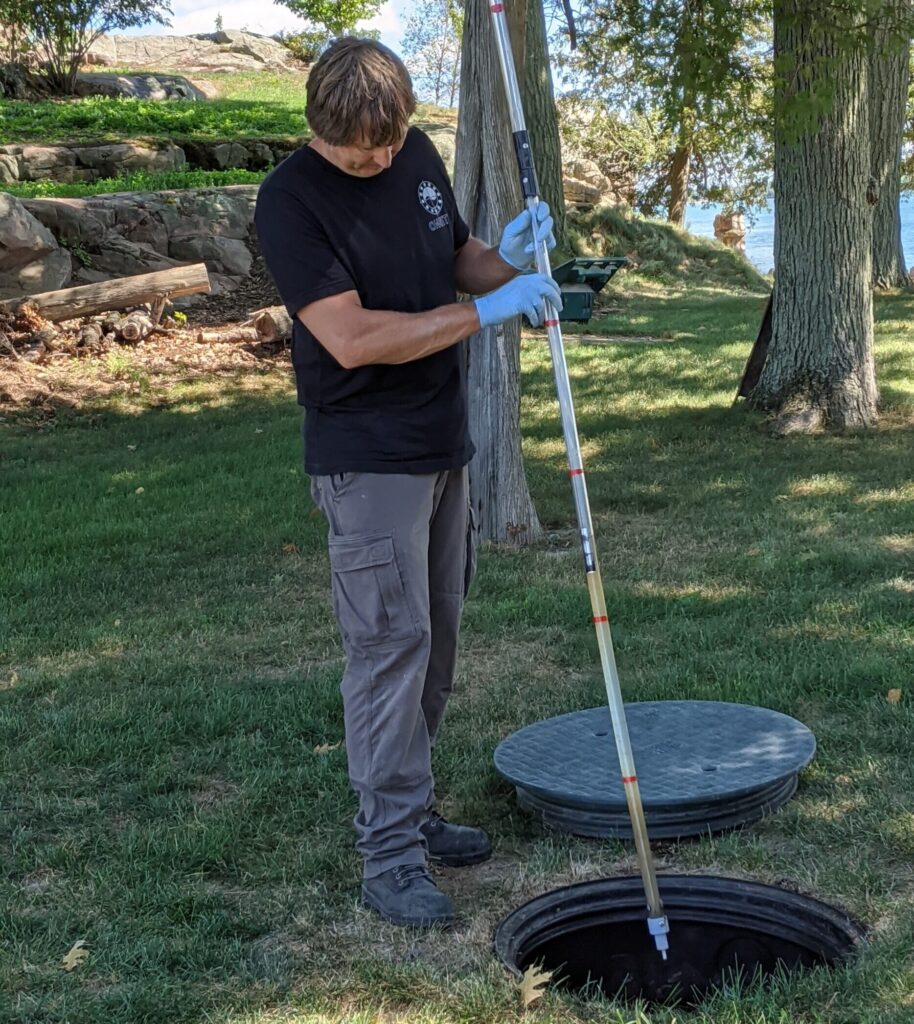
In August and October, Lauren Eggleston was able to travel with Eric to see some of these innovative systems in the field. Together they checked septic tanks at properties located along the river and mainland shoreline. Below, find some useful tips for checking your own tanks; Photo 01 shows Eric demonstrating use of the Sludge Judge for Step 4.
How to Check a Septic Tank
Septic tanks should be checked at least once every five years. As homeowner, you can easily inspect your septic tank by following the simple procedure outlined below. It is important that you never climb into the septic tank at your property. Poisonous gases are present in septic tanks that have been known to cause death by asphyxiation when people enter without proper equipment.
- Remove the septic tank cover. The cover will be at the end of the tank nearest the house. If the location of the tank is unknown, check the direction of the large wastewater pipe coming from your toilet. The tank is usually located in the direction the wastewater pipe is pointing, about 10 feet from the house. On most waterfront properties, the top of the septic tank is less than a foot below the ground surface and many are at ground level or above. A typical steel septic tank is shaped like a flattened oval. The cover is held in place by several tabs which must be bent back before removal. Fiberglass tank covers may be bolted in place. Concrete tanks usually have a metal lifting handle on the access cover.
- Preparing a dipstick. A dipstick is required to check the sludge depth. An effective stick can be made by fastening a flat piece of wood about six inches wide to the end of a long stick. The purpose of the flat piece of wood (plate) is to get a “feel” for the sludge. A plain straight stick will easily push through the sludge and make evaluation of the depth difficult.
- Evaluation of Tank Contents. After the cover is removed, note the level of the liquid in the tank. It is normal for there to be scum or crust on top of the liquid. Sometimes this will be over an inch thick and appear almost solid. The level of the liquid or crust should be below the inlet baffle. If it is above the inlet baffle, there is a problem with the outlet tank or leach field. If the level of the liquid is very low (more than four inches below the inlet pipe) there may be a leak in the tank. If you find either of these situations, have the system checked by a service contractor.
- Sludge Evaluation. After breaking through the crust, if there is one, slowly push the plate end of the stick down toward the bottom of the tank. Keep the stick as vertical as possible. When the plate reaches the top of the sludge, mark or note the approximate depth of the stick. Then push the stick down through the sludge until the plate hits the bottom of the tank. The distance from the top of the sludge to the bottom of the tank is the sludge depth.
Normal sludge depth is one to four inches. If greater, or if there is less than 10 inches of water above the top of the sludge, check with a service contractor about a pump out. If there is a solid, thick (over one inch) crust on the top, it can be carefully removed with a shovel and disposed of by burying. Strive to Leave No Trace if you opt to bury the crust by checking suggestions for distance from water sources and depth of burial. Thick crusts may be the result of putting too much soap, grease, or fats down the drain.
- Baffle Evaluation. The condition of the baffles should be checked to be sure they are in place and not rusted out. The baffles can be checked by sliding the plate end of the stick down the edge of the inlet baffle. The lower end of the baffle is well above the bottom of the tank. On most tanks, angling the dipstick toward the far end of the tank can also check the outlet baffle.
- Replace the cover and bend the tabs back to secure it in place.
- CAUTION: When experiencing a septic tank problem, property owners frequently assume the tank needs to be pumped. This may not be the case. If a toilet is malfunctioning or the septic tank overflows or smells, the real problem may be a clogged line to the septic tank or a plugged leach field. You should check to make sure your tank is overloaded with sludge and/or scum and really needs to be pumped before you call a service provider. In fact, seasonal-use tanks seldom need to be pumped.